In this article, we take a look at the
installation of Cloudera QuickStarts VM.
Cloudera, one of the leading distributions of Hadoop, provides an
easy way to install Virtual Machine for the purposes of getting started quickly
on their platform.
Cloudera provides some big data libraries
such as Hadoop, Hive, Hue, HBase, Oozie, Spark.
Prerequisite: For Cloudera Quickstart to run on the system, At least 12GB+ RAM (i.e. 4GB+ for operating system & 8GB+ for Cloudera), although 16 GB+ is preferred. Cloudera runs on CentOS, which is the community edition of the Linux. Windows system must support 64-bit.
Install VirtualBox
Step 1: Click the following link and download the correct version for your operating system.
https://www.virtualbox.org/wiki/Downloads

Step 2: Install “VirtualBox-6.1.8-137981-Win.exe”.
Double-click the setup file that you downloaded in the previous step and follow the prompts to install. Note: During the installation, keep all of
the options set to default
If you want to change the default folder where the Virtual machines are
installed, open the Oracle VM VirtualBox and follow the steps: Go to
File -> Preferences -> General -> Default Machine Folder ->
Folder of your choice
Install Cloudera for VirtualBox
** It requires 64-bit host OS
Step 3: Go to:
https://www.cloudera.com/downloads.html
Select the “Cloudera QuickStarts” click on “Download Now”.
Note: The Cloudera Quick start VM has been discontinued as It was based
on CDH 5.13 which is going end of support in the Fall of this year.
You can also try out with HDP, click the link below,
https://www.cloudera.com/downloads/hortonworks-sandbox/hdp.html
Configure VirtualBox & Cloudera
Step 5: Open the VirtualBox, and create a new VM.

Give it a Name of your choice. Select Linux as Type and Red Hat (64 bit)
as Version. Click Next.
Step 6: Configure the RAM for VirtualBox.
Give it at least 8GB of RAM and click Next button. If you have more amount of RAM, you can assign more than 8GB. The more, the faster. Note: The Host OS requires at least 4 GB for the normal functioning. So, be careful not to assign all the RAM to the Virtual Machine.

Step 7: Add the Cloudera “cloudera-quickstart-vm-5.8.0-0-virtualbox-disk1.vmdk” that was previously downloaded and extracted.

You have successfully installed Cloudera QuickStart VM.
Step 8: Click on “Settings”, and give more CPU cores if you have and enable “bidirectional” drag/drop feature.
Changing some of the settings for better performance and ease of use
:

PowerOn the VM “Cloudera-5.12” that you had just added by double
clicking on it, and it will take some time to launch.

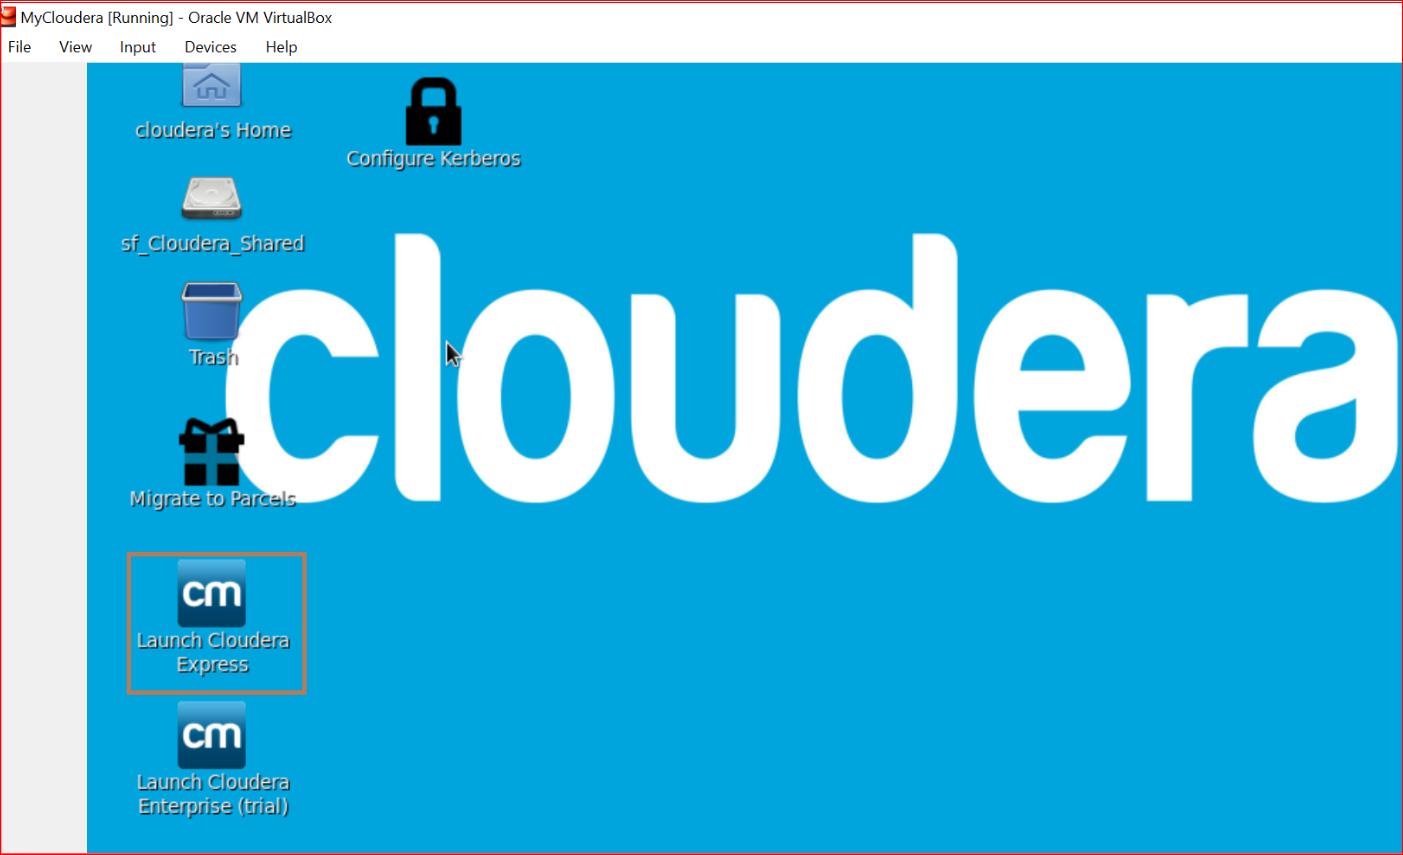
Step 9: Minimize the browser and Launch Cloudera Express on the Desktop. This requires at least 8 GB of RAM and at least 2 virtual CPUs.
Step 10: It will take some time to start and once started, you can login to “Cloudera Manager” via the browser with http://quickstart.cloudera:7180/cmf/login
username: cloudera
password: cloudera
Step 11: Make sure that the relevant services are started, and if not
start them.

When you “power off” or close the VM, select the “save the machine
state” so that it starts quickly next time.